Showing posts with label DIY. Show all posts

September 2, 2018

Beads in Wire Woven Bangle Tutorial

This tutorial shows how to make a Wire Woven Bangle.
Printer friendly -5 pages
Buy this tutorial here

March 28, 2017

Cotter Link Chain


Tools and Materials:
·         20ga dead soft round wire (1.5" (4cm) for one link)
·         Flat nose pliers
·         6 Step Barrel Pliers (you may use round nose pliers with 5mm and 2mm diameter marks)
·         Wire cutters

June 26, 2016

Bracelet Sizer


I made these three bracelets that are the same length (8”) but they fit differently because the size of the beads.
You can make your own bracelet sizer from Styrofoam cup.
First, I made templates with pieces of thread, one for each size.
Fold the thread in half; place a knot half size away from the fold. For example, for 7” size, place a knot 3 ½” away.
Turn the Styrofoam cup upside down and slide the thread templates on it. Mark the cup with sharpie marker tracing on the threads and write the size too.
 Slide your bracelets to determine the size (my blue large bead bracelet does not fit for this cup).
Helpful guidelines for bracelet sizes:
I work on the following rule for making my bracelets:
wrist measurement + 1 inch = bracelet size
Women's Sizes: 
Small: 6.5"
Average: 7"
Large: 7.5 – 8"
X-Large" 8.5+"
Men's Sizes:
Most Common: 8"
Average: 8-9" 
Ankle Bracelet (Anklets)
Most common: 9"
Average: 9-10"

April 15, 2016

Oval jump rings

Oval jump rings are a great alternative to round jump rings. These rings are ideal for connecting clasps, charms or beads to chains.
Need a mandrel to make your own oval jump rings? Use a set of two the same size knitting needles, wrap your wire around them.
  Carefully remove coil and cut evenly with sharp flush cutters (double- flush cutters work the best).
 

March 8, 2016

Celtic Wig Jig Earrings

Here is another video how to make a beautiful pair of Celtic Wire Earrings using a Wig Jig.
The final product

February 28, 2016

Beaded Coral Tassel Tutorial


This lesson shows how to make beaded coral tassel. You can use this technique for making earrings, key-chain and bag charms. 
Materials:
Seed beads #11/0
Focal bead (or group of 2-3 large beads)
Beading thread
Lobster clasp (for bag charm)
Split ring (for keychain)
Ear hooks (for earrings) 
Tools:
Beading needle #12 
Scissors (or thread burner) 
Instruction below will show how to make a bag charm, but you can use this technique for making earrings as well.
Step 1: On a comfortable length of thread, pick up focal bead(s) and lobster clasp. Place this group in the middle of thread.
Step 2: Pass the thread back through the bead(s) skipping the clasp. Tighten.


Fancy Pyramid Pendant Tutorial


This tutorial shows how to make a 3D pyramid wire wrapped pendant.

Printer friendly- 6 pages, 33 steps

Materials and tools:
18ga round dead soft wire
26ga round dead soft wire
3mm round beads
Round nose pliers
Wire cutters
Chain nose pliers
Wig-Jig® Cyclops with pegs – optional
Extra optional: chains, beads, headpins

Tutorial is HERE

August 15, 2014

Boho Style Chandelier Pendant

Do you have some jewelry piece that is broken, has missing parts, or you do not wear it but would love to give it a second life? 
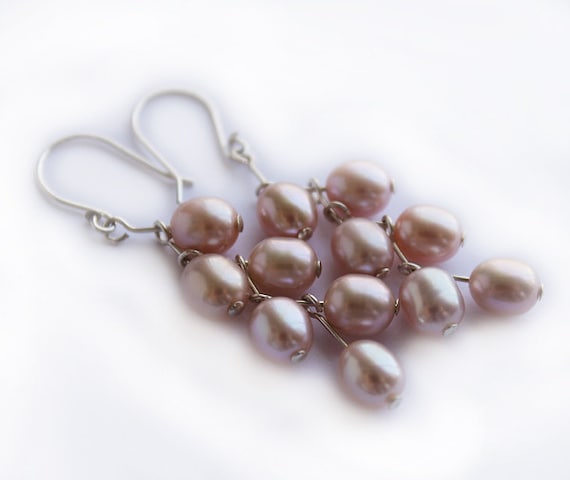
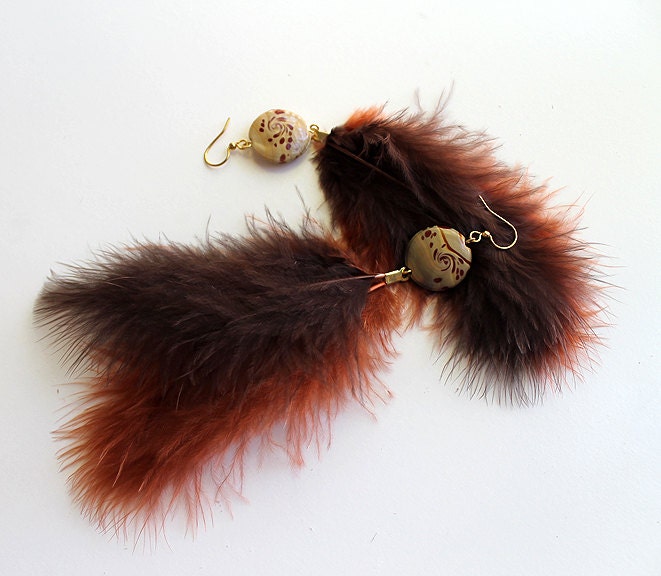
That is what I had before: a pair of broken earrings with missing beads.
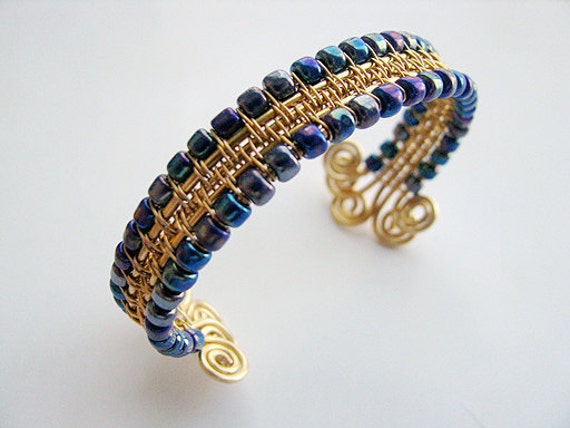
The finished result - Boho style pendant!
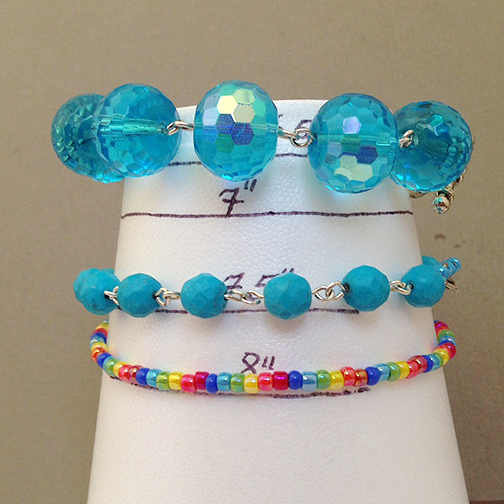
Extra materials you will need:
Head pins, eye pins*, a jump ring, extra beads of your choice.
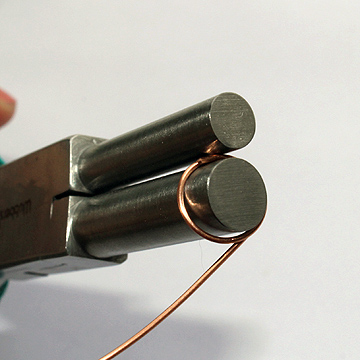
1. Take off all the beads you have on your broken jewelry. Clean all the beads and findings if necessary (one of my earrings metal broke while cleaning it, that's why I made a pendant, not a pair of earrings). 

August 1, 2014

Golden Bohemian Necklace - Reusing and Repairing Jewelry

Do you have some jewelry piece that is broken, has missing parts, or you do not wear it but would love to give it a second life?
My friend Tanya had this pretty golden bracelet with stretched cords. Guess what? We made three different pieces of jewelry from this bracelet!
First jewelry is this eye catching bohemian style necklace.

July 17, 2014

Work with WigJig - Part 2 - Video

Today, I want to show how to use a wire-wrapping Jig while making this pair of earrings.

In general, I use 20 gauge wire for earrings, 18 ga wire for bracelet components and 18 or 16 ga wire for necklace components. Using dead soft wire may require hardening of the finished piece.


You may use different size of pegs to change  a size of the loop like here.
Use the same element as an embellishment for  a pendant.

Work with WigJig - Part 1

July 7, 2014

Beaded Tea Ball Infuser

Whether you're brewing cups of your favorite loose-leaf tea or seasoning wine, cider or soup with spices, you'll be happy to have these infusers on hand. Having a nice looking infuser makes your tea taste even better.
You will need an infuser, beading wire 1 ft, crimping beads, beads of your choice, and crimping pliers (buy them here). I have one large bead (diamond shape in my case) as a focal bead.

May 4, 2014

Marking your pliers with crystals

Yesterday I was teaching a jewelry class.  Some of my students had the same tools that looked alike (e.g. all crimp pliers look alike). While teaching classes  (or taking a class), you may accidentally grab somebody's pliers. To know which tool is yours,  simply mark it :) 
I have all my pliers marked with Swarovski hotfix crystal rhinestones, 5mm.
Clean the surface of your pliers from grease and dirt. 
These crystals are "not recommended for leather, water resistant material or non-porous surfaces", so I put a tiny drop of 'Jewelry&Metal Glue'.
Also, you can use adhesive backed crystals (you find them in scrap-booking department). There is just one snag - those crystals may "wear out" and have not pretty look.
Also, you can use paint to mark your pliers. Just do not paint handles.

April 15, 2014

DIY: Bead Crimping: Necklace - Bracelet

Today I want to show you how to make a necklace or a bracelet using beading wire.
 Beading wire is a flexible stainless steel wire that consists of several strands of wire bound in a nylon coating. It combines the strength of steel with the softness of thread. The more strands in the wire, the more flexible your project will be. There are several brands of beading (stringing) wire on the market: Beadalon®,  Accu-Flex®, Soft Flex®, etc. 

To make this necklace you will need: variety of gem chips, beading wire, two crimp beads, 2 crimp covers, clasp (toggle), crimping pliers, chain nose (I used bent nose) pliers, wire cutters

March 11, 2014

Oxidizing Jewelry with Liver of Sulfur

If you want to add a rustic or antique look to copper, brass, or silver jewelry, add a patina by oxidizing it. 
I will show how I oxidized my copper bracelet with liver of sulfur. 

You can find liver of sulfur in a liquid, gel, or dry (rock) form.
First, clean the piece that you plan to oxidize using a soft, dry cloth. This will ensure that any dirt or  oil does not cause uneven oxidation.

May 27, 2013

Two-loop wire wrapped connector

Wire Wrapped Two-Loop Link 
Materials
  • 20- to 24-gauge round dead soft wire
    Size of the wire depends on the size of the link you are going to make. The bigger the link, the thicker the wire. 
Tools
  • Chain nose pliers
  • Round nose pliers or 6-step Barrel Pliers
  • 9mm Bail Making Pliers (or a matching cylindrical object such as a pen)
    Diameter of the bail making pliers depends on the size of the link.
  • Nylon jaw pliers (optional)
  • Wire cutters
Instructions
  1. You can start working from the spool. Wrap the wire one and a half times around a 9mm jaw.
    Wire Wrapped Two-Loop Link
    Wire Wrapped Two-Loop Link

April 30, 2013

Nailed Pearl Earrings


While I was threading pearls onto headpins for another project, the way they were lying on the table brought this idea to me. Of course, you can change the color of the pearls or the metal; or even use crystal beads instead of pearls, to alter this "cluster" design. Making an ear hook from a headpin really saves time too, because its end is already filed!

Materials and Tools

  • 12  8mm freshwater pearl beads
  • 12  3/4" head pins, in a gauge that fits your chosen pearls
  • 2   2" 21-gauge head pins
  • Round nose pliers
  • Chain nose pliers

March 9, 2013

Wire Woven Bangle

If you want to learn how to make this cool, contemporary wire bangle bracelet, I have a tutorial for you! Perfect for any age, this fun bangle stands on its own.
https://www.etsy.com/listing/125951017/wire-woven-bangle-tutorial-pdf
Supplies you will need: seed beads #6 (or 8 with a large hole) and, of course, wire! The main tools are your hands, but it's good to have a pair of chain nose pliers, round nose pliers, and wire cutters handy :) This tutorial has 6 printer-friendly pages with 18 steps and 20 step-by step color photos.
Click HERE  to get tutorial.

December 2, 2012

DIY: Feather Earrings

Today, I will show how to make Stylish Feather Earrings For Stylish Women.
To make a pair of these earrings you will need:

- pair of ear-wires
- cord ends - 2
- eye-pins -2
- lamp-work beads (or any beads of your choice) -2
- feathers
- round-nose pliers
- chain-nose pliers
- wire-cutters

March 19, 2012

DIY: Crystal Dangle Earrings + Video

Spring is here, and you want to change your wardrobe and maybe, make new jewelry. Why not to make a new pair of crystal earrings? It's fun and easy!

To make a pair of earrings like mine, you will need:
  • 6mm Swarovski bicone crystals - 6
  • 2.5mm metal beads - 6 
  • 2" headpins - 2
  • Earwires -1 pair
  • Chain nose pliers, round nos pliers, wire cutters
Here, you can watch a video how to make these earrings:


PS. I thank my friend Tanya for capturing video and photos while I was making this beautiful earrings.