I never thought I would do anything with metal etching. Well, never say "never", right? Thanks to Meredith Arnold, I wanted to try etching.
I had everything I needed to start: metal (copper and nickel silver) disks, PCB Enchant (ferric chloride), Staz-On ink with rubber stamps, black ultra-fine Sharpie, washing soda, gloves...
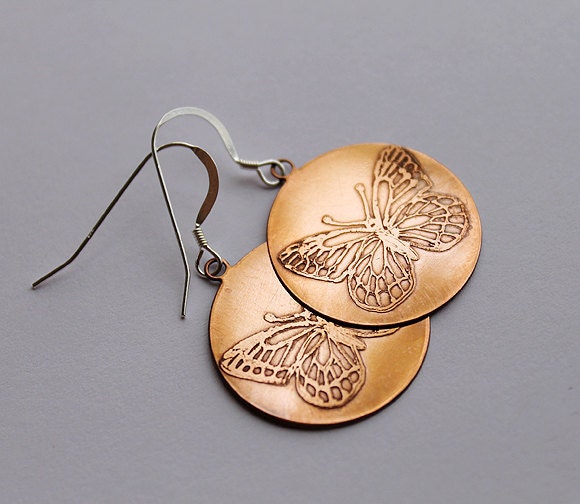
First, I started with copper disks. I bought a small stamp with butterfly at Michaels (on sale for $2.00) and a leaf stamp for $1.00. I used to make scrap-booking cards and books. What could be easier to make a nice stamp? Hah! Paper and metal "behave" differently. If it was easy to make a leaf stamp, but my butterfly wanted to "fly" away and smear the print... I had to re-stamp it 3-4 times, I think. But I am happy with the results.
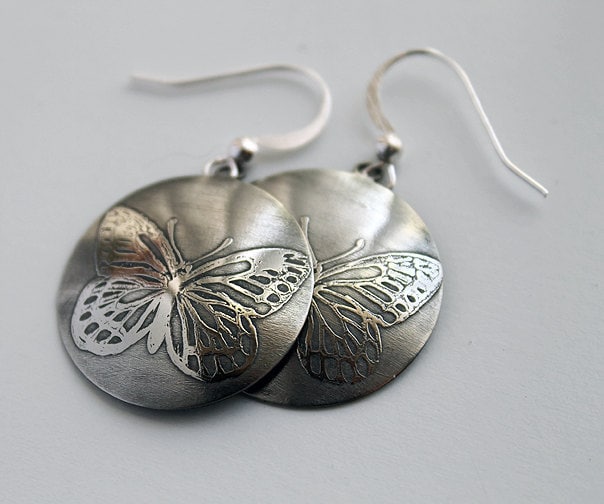
Well, I was happy with copper, but not satisfied with nickel silver disks :( Initially, both metals, copper and nickel silver, were shiny...
After etching, copper came out shiny, but NS etched part was dull even after polishing with Euro-Shine and polishing cloth. Maybe I need something else to polish them...or just give them to my daughter to play with :)
UPD2. Beaducation has a new FREE class: Etching Base Metals. In just 15 minutes, you will learn the basics of etching copper, brass and nickel silver with ferric chloride.
wow, copper ones really DID come out great!
ReplyDeleteGood idea, very beautiful!
ReplyDeleteBeautiful results for your first try!
ReplyDeleteAlbina, did you use the same bath for both metals at the same time? It's best to etch different metals separately and keep the solution you use for each metal separate, too. Great results!
ReplyDeletePersonally, I prefer the nickel silver ones - they would suit my personal style more, and they would be the earrings I would buy if I had the option of both. I like that the design is shiny while the rest isn't. So don't give them to your daughter to play with, they're gorgeous!
ReplyDeleteThese are wonderful. I wish you would have put a step by step tutorial for us.
ReplyDeleteThis comment has been removed by a blog administrator.
ReplyDeletegreat work, love both designs
ReplyDeleteI get squiggly lines on the edges of everything I etch with PCB. What is your secret?
ReplyDeleteThis comment has been removed by the author.
ReplyDeleteThanks for sharing such an effective experience. This was very tech educative lesson for me as I was looking for getting some good ideas on benefits of laser and metal etching machine details and price ideas too. Just few minutes back, I took a tour to https://www.heatsign.com/benefits-of-laser-etching-machine/ and to find more ideas I was surfing and finally found this brilliant post. This is cool work surely. I like the way you have disclosed the whole project.
ReplyDelete